
Before and After: $130 Takes Two IKEA IVARs From Boring and Basic to Art Deco Glam
Two of the best things about IKEA furniture? One, it’s low-cost, and two, it’s often basic in a good way — meaning it’s easily hackable, customizable, and the DIY stakes are somewhat low if you make a mistake.
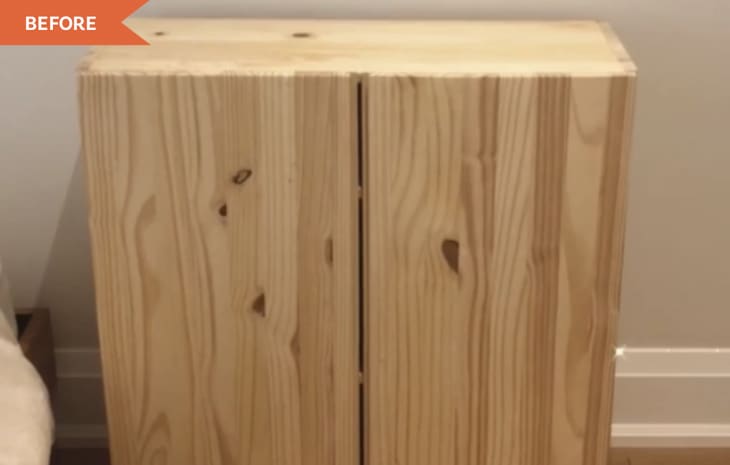
When blogger and DIYer Alana Gennara bought her two basic IKEA IVARs ($95 each), she got them with the intention of transforming them. “I never refinished or flipped any furniture before, so this was a scary and exciting undertaking for me,” she says. “I found myself with two cabinets and this vision I wanted to create!”
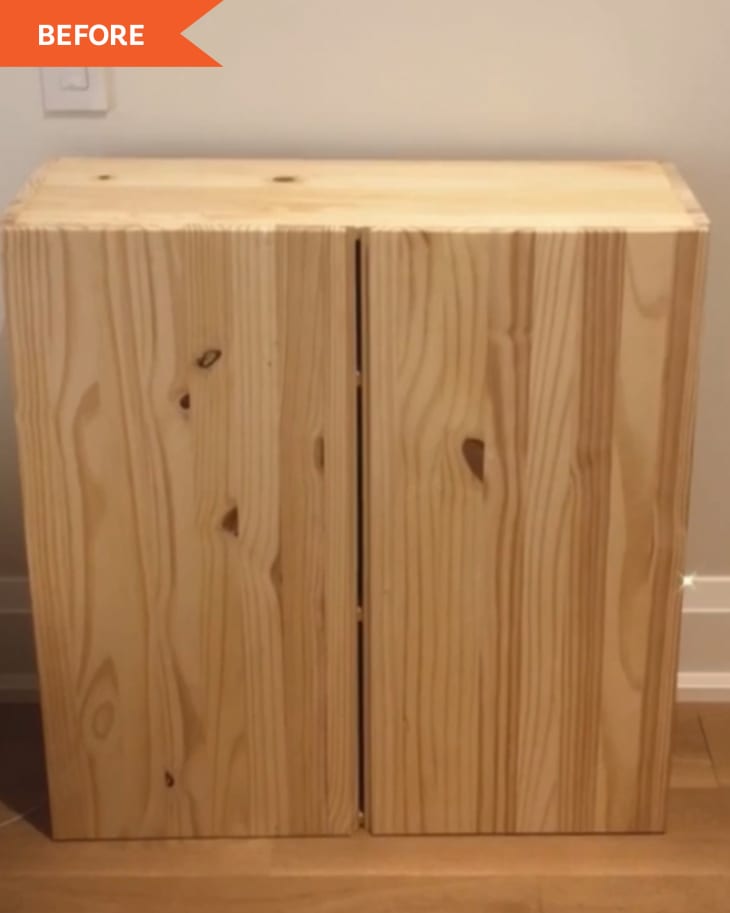
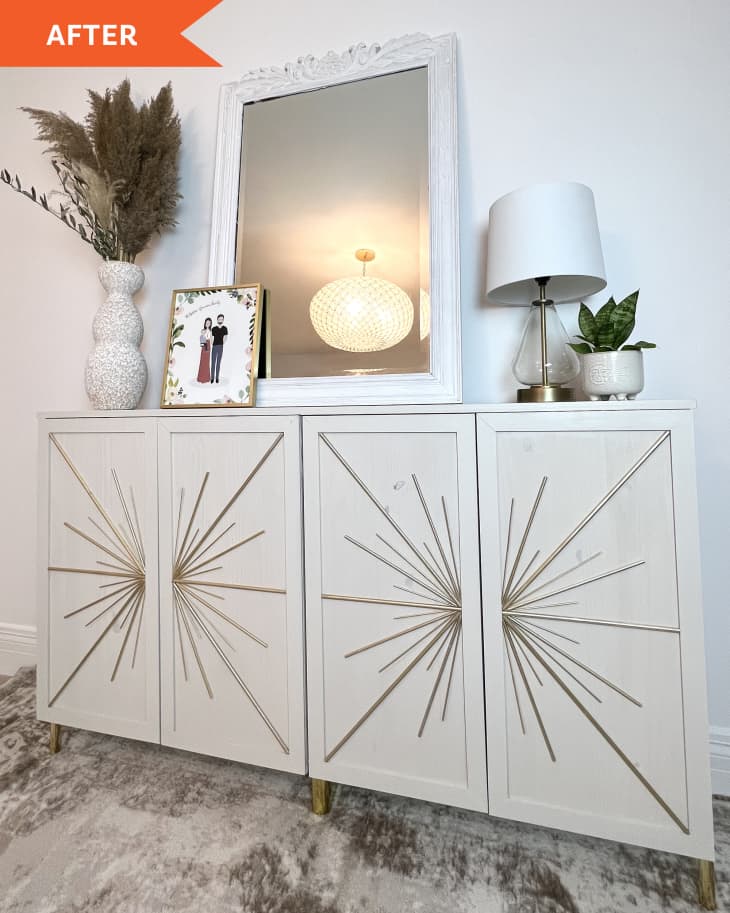
Her vision involved a starburst-like linear design on the doors. At first, she thought the pair would make good nightstands, but with legs added, she realized they’d be a bit too tall. She decided to use the cabinets as clothing storage in her bedroom instead.
“The vision of the starburst design still needed to be manifested, so I decided to move forward with the project anyway,” she says. “It actually all worked out because we needed a dresser in our bedroom to keep our 2-year-old son’s clothing in.”
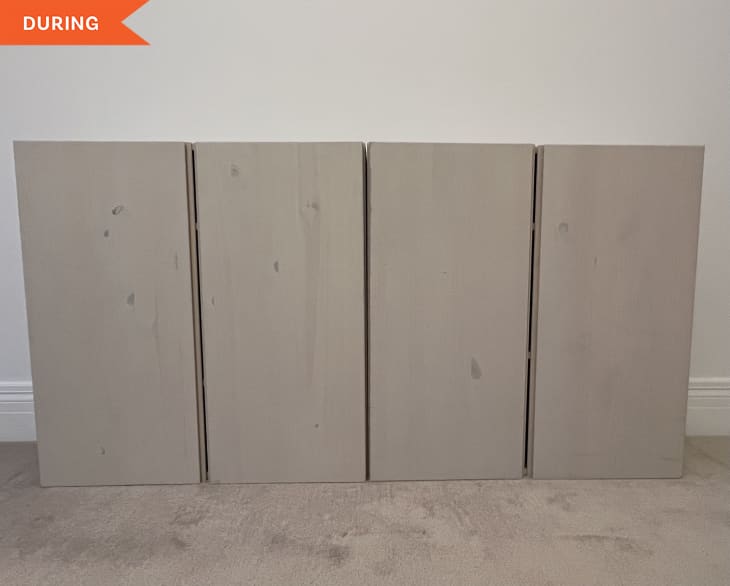
To create her new stylish storage, she primed and painted the cabinets, trim and countertop (made from two small slabs of wood caulked together) all the same oatmeal color, Valspar’s Warm Putty. She also spray painted some wooden dowels she would use for the design detail gold.
Next, she added some poplar trim to the doors to give them a Shaker-style look. “I used my brad nailer and some wood glue, but you could totally get the job done with just some glue,” Alana says. “Then I added my starburst design within the trim.”
To get her same radiant look, Alana recommends using three different sizes of dowels (she chose 1/8-, 1/4-, and 5/16-inch dowels for variation). “I simply used an X-acto knife to cut the dowels and some wood glue to adhere them to the doors.”
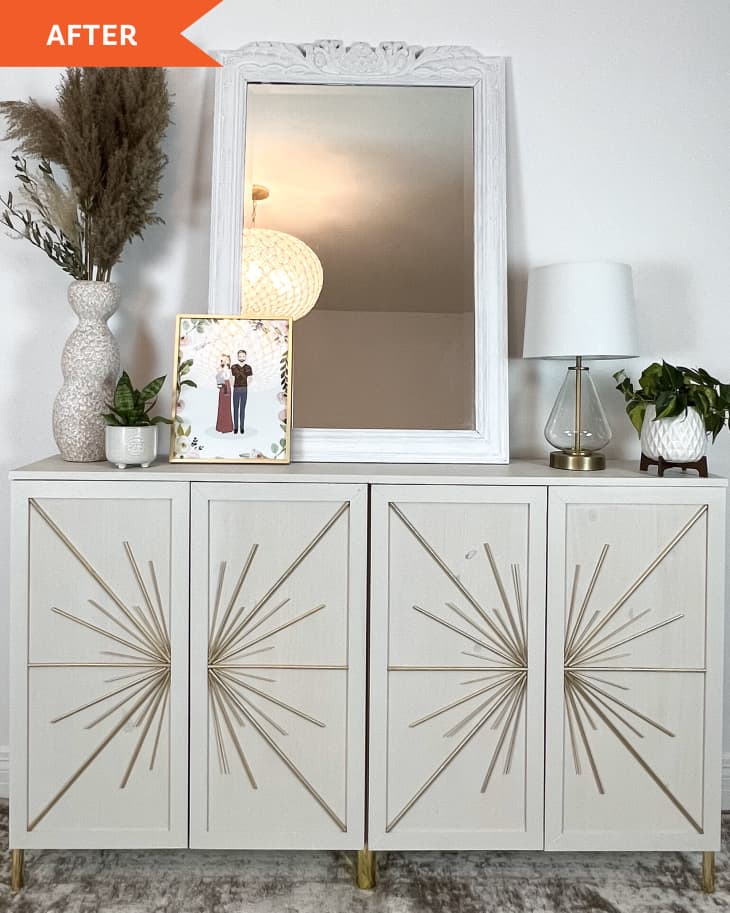
The trickiest part of the project was the last part: adding the metallic legs, which attached from the side. “I’m not sure if it would have made a difference or not if they could have been put under the dresser and placed more strategically closer to the center, but the dresser started to cave in — ahhh!” Alana recalls. “I really loved the legs and didn’t want to change them, but I also needed to find a way to support the middle of the dresser with a leg that matched the ones I already had.”
She added a 2×4 piece of wood wrapped in gold metallic paper to add support and prevent bowing. “It was definitely a proud MacGyver moment of mine,” she says.
In total, her material costs (not including the dresser) were about $130. “This is a great beginner DIY,” Alana adds. “You don’t need any power tools, all the cuts can be made with a hand saw. That being said, a miter saw will make it easier, but it’s not necessary.”
She’s proud of the unique Art Deco-looking vibe she added to the cabinets. “I love how elegant and unique the piece is. It is like nothing I had ever seen before,” she says.
She also loves the added storage in her bedroom, but mostly she loves that she made a bespoke piece of furniture with her own two hands. “I brought something I had only imagined in my mind to life, and that was a really cool feeling,” she says.
Inspired? Submit your own project here.